参考:https://docs.whmcs.com/Configuring_Sign-In_using_Google
- Visit https://console.developers.google.com/.
- Log in to your Google account.
Changing the Google account you use to create the app requires users to reauthenticate and relink their accounts.
- Choose Select a project on the top menu.

- Choose New Project.

- Enter a project name.
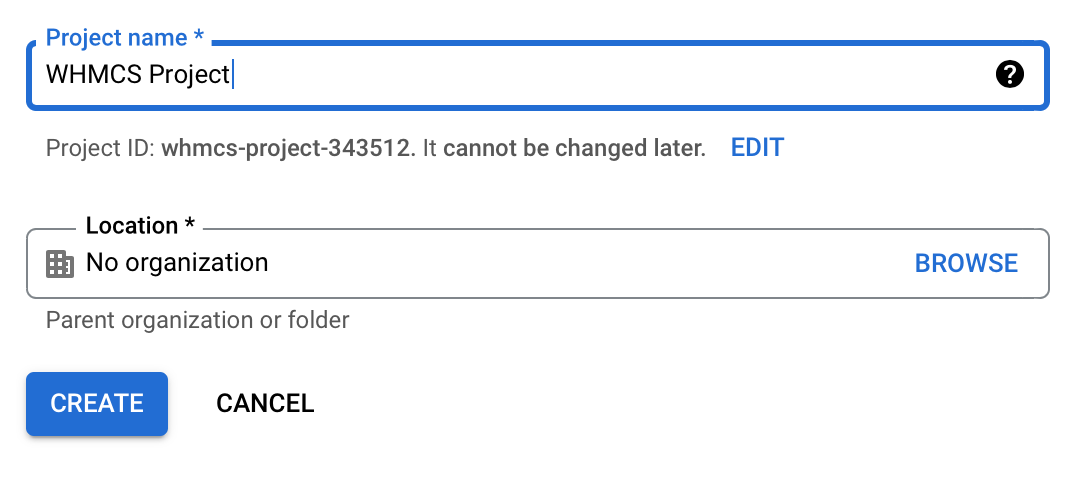
- Click Create.
- Select Credentials in the left sidebar.
- Choose Create Credentials.

- Select OAuth client ID.
- Click Configure Consent Screen.
- Select External.
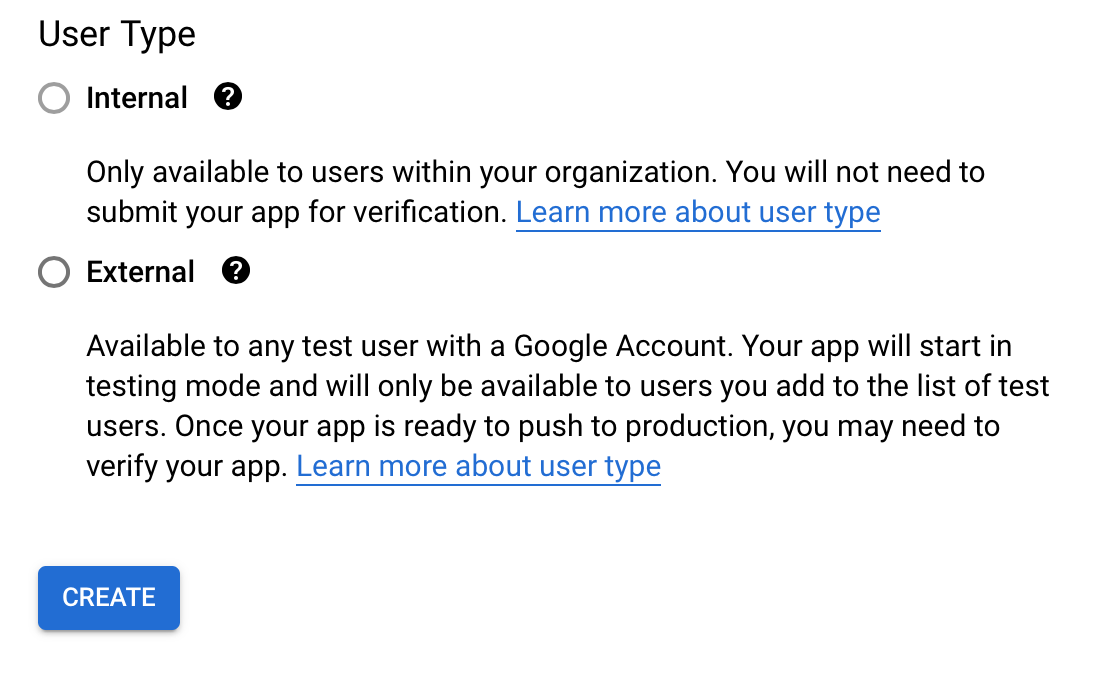
- Click Create.
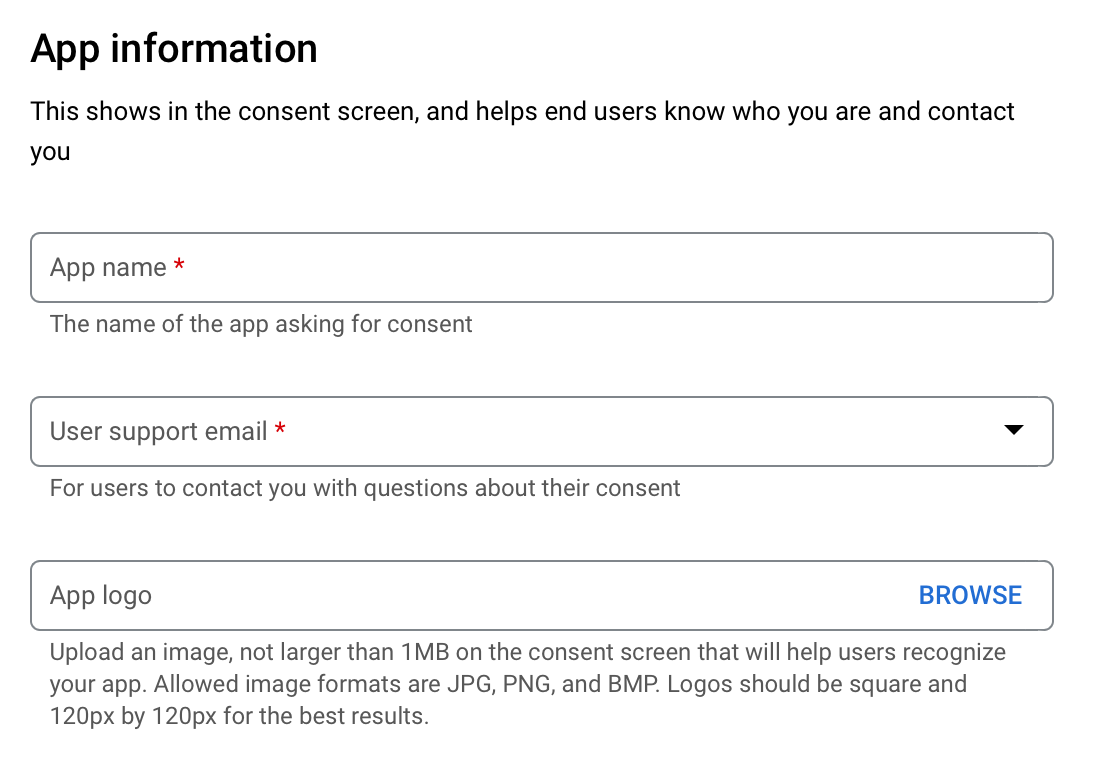
- Add app information details.
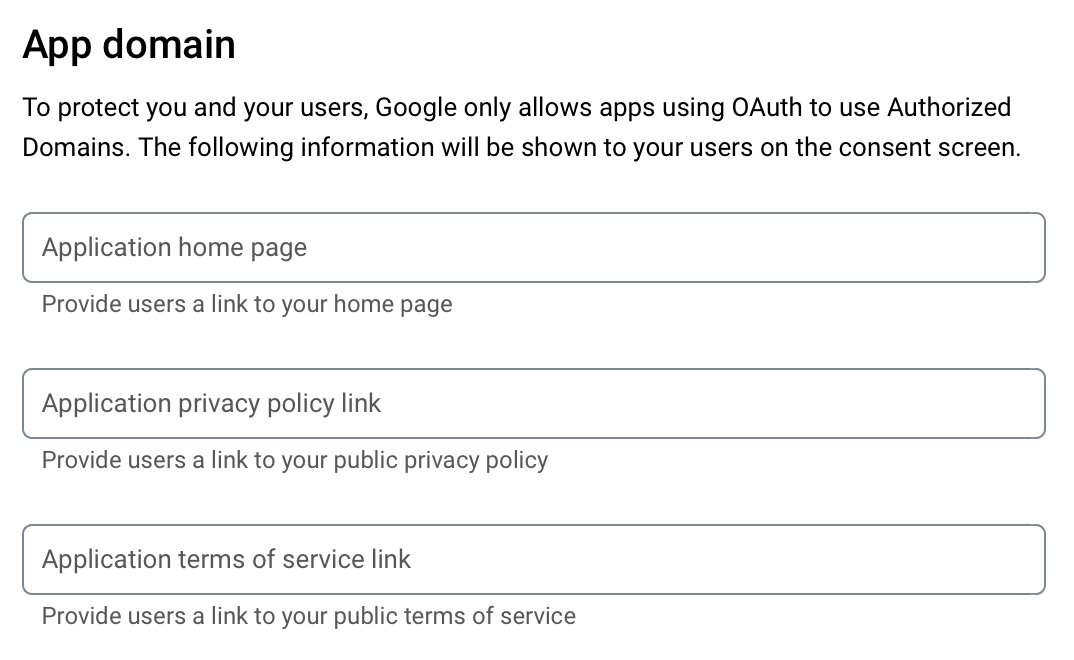
- Add an app domain.
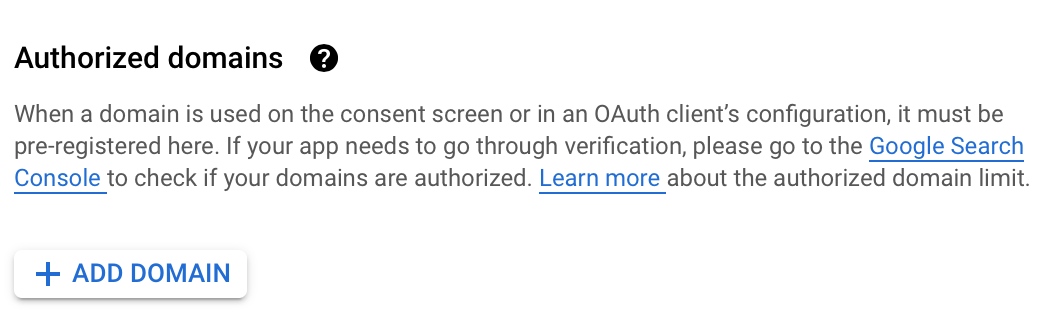
- Add authorised domains.
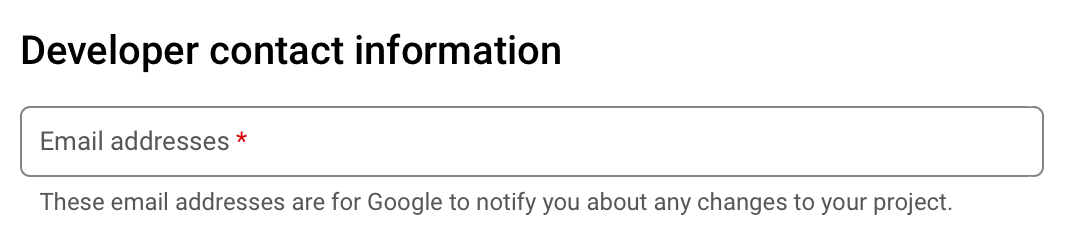
- Add developer contact information.
- Click Save and Continue.
- Select Credentials in the left sidebar.
- Choose Create Credentials.
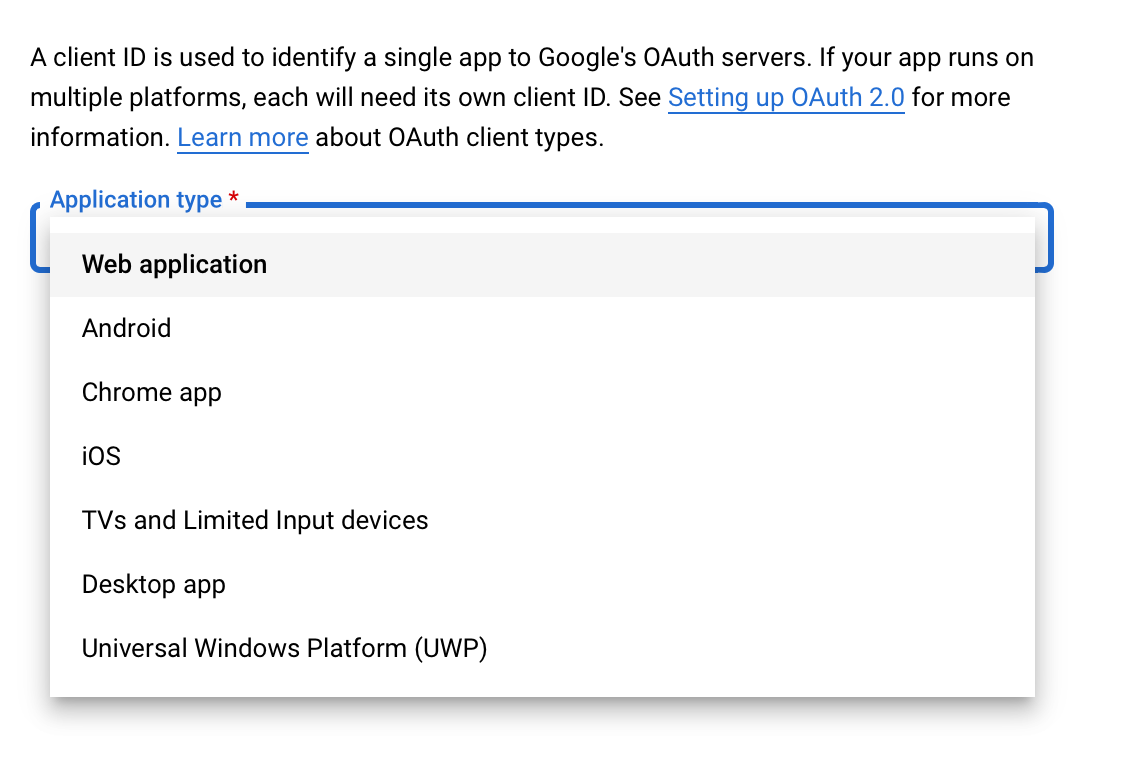
- Select OAuth client ID.
- Choose Web Application.
- Enter a name for your OAuth 2.0 client.
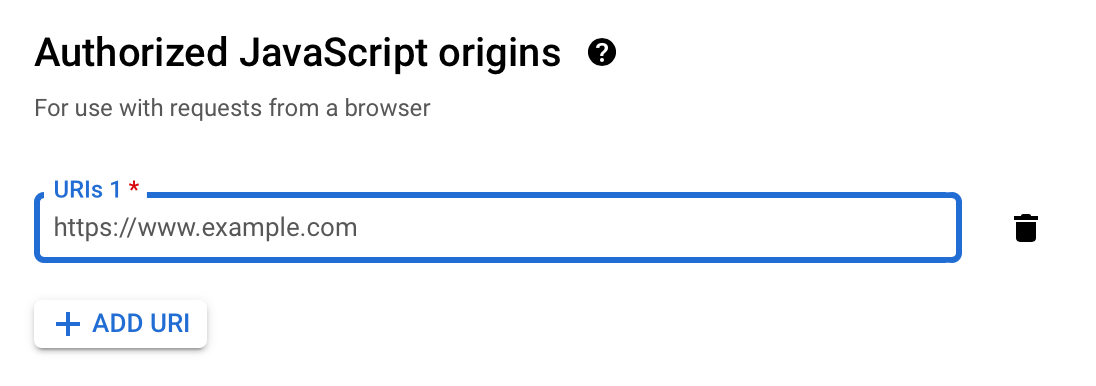
- Enter your full root domain in Authorized JavaScript origins.
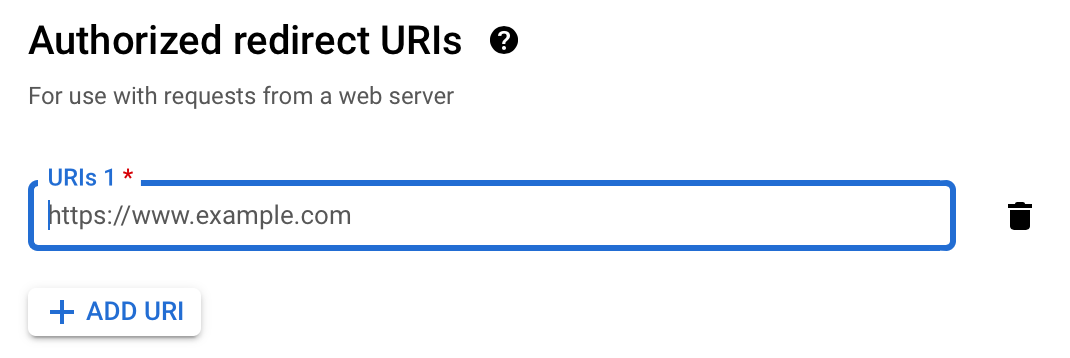
- Enter your full root domain in Authorized redirect URI.
- Click Create.
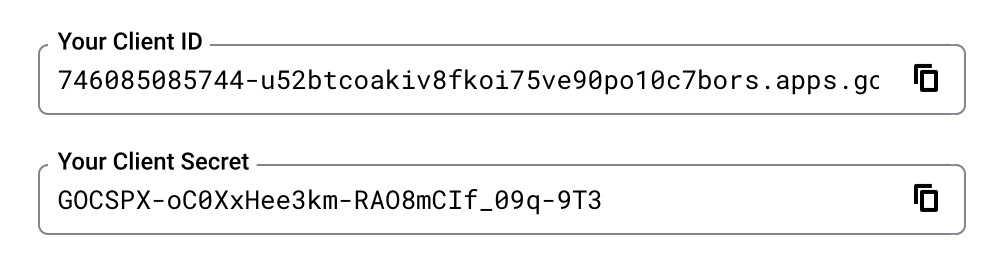
- Save your client ID and secret, which you will use to activate Google Sign-In within WHMCS.
- Log in to the WHMCS Admin Area.
- Navigate to Configuration () > System Settings > Sign-In Integrations or, prior to WHMCS 8.0, Setup > Sign-In Integrations.
- Select Activate under the Google heading.
- Enter your Google Client ID and Client Secret.
- Click Save & Activate.


WHMCS will attempt to validate the details you have entered. If the client ID and secret are valid and successfully authenticate with the Google API, the values will be saved.
报错:Google Sign-In is unavailable at this time. Please try again later. Error: You have created a new client application that uses libraries for user authentication or authorization that are deprecated. New clients must use the new libraries instead. See the [Migration Guide](https://developers.google.com/identity/gsi/web/guides/gis-migration) for more information.
报错:Action Required
Comply with domain verification requirements
Ensure your application’s domains have completed the Search Console verification process